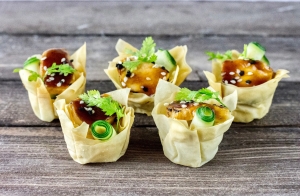
Tempura is a popular Japanese fried delicacy that is now enjoyed by people all over the world. It’s so easy to prepare that your benchtop won’t be messy as imagined. That golden crispy treat is actually healthy, too, because it uses fresh seasonal ingredients and substitutes regular cooking oil with sesame oil. The most popular of all tempura is the tempura shrimp. Second to shrimp or prawn tempura are veggie tempura and other seafood or fish ingredients like squid or fish. 

You can make your own shrimp tempura or popcorn shrimp, right in your own kitchen. Pair it with a spicy mayonnaise and zesty vinaigrette. We have the right mouth-popping recipe from SBS just for you!

Easy Tempura Shrimp For Fridays

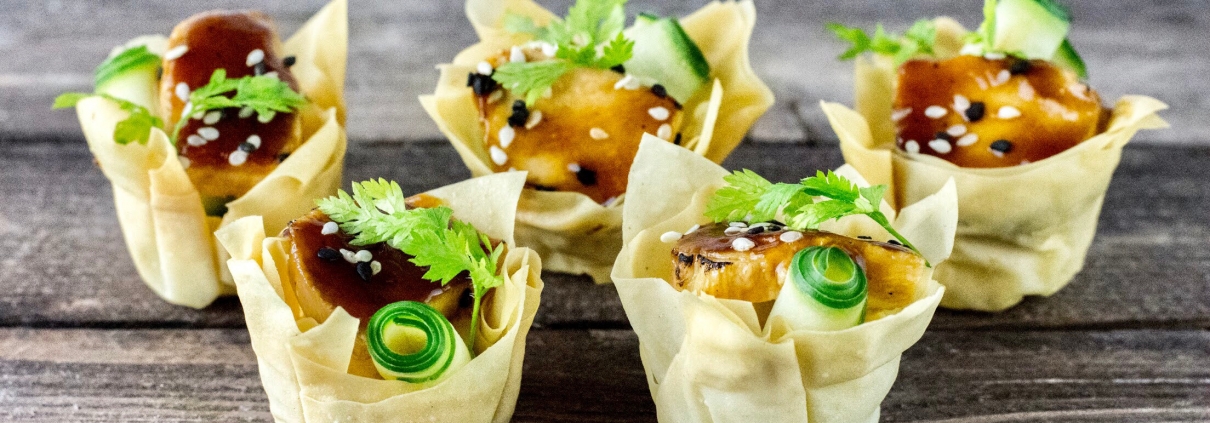
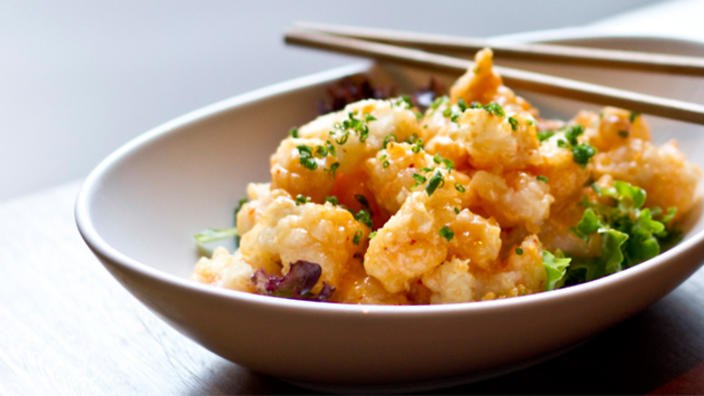
Image from SBS Recipe page.

INGREDIENTS:
vegetable oil, for deep-frying
500g prawn meat, chopped into 1.5 cm pieces  
250g tempura flour (see Note)
60g mesclun (mixed) salad leaves mix    
20g finely chopped chives   

Lemon dressing
75ml freshly squeezed lemon juice (about 2 lemons)  
100ml grapeseed oil   
40ml dark soy sauce
7.5g minced garlic (about 1 heaped tsp)   
1 pinch freshly ground black pepper

Spicy mayonnaise
300g good-quality whole-egg mayonnaise
50g chilli garlic paste

Tempura batter
200g tempura flour
300ml cold water

COOK’S NOTES:
Oven temperatures are for conventional; if using fan-forced (convection), reduce the temperature by 20˚C. We use Australian tablespoons and cups: 1 teaspoon equals 5 ml; 1 tablespoon equals 20 ml; 1 cup equals 250 ml. | All herbs are fresh (unless specified) and cups are lightly packed. | All vegetables are medium size and peeled, unless specified. | All eggs are 55-60 g, unless specified.

INSTRUCTIONS:

Step 1
To make the lemon dressing, whisk all of the ingredients together to combine. Set aside. Makes 200 ml.

Step 2
To make the mayonnaise, combine the ingredients and set aside.

Step 3
To make the tempura batter, mix the ingredients until just combined until it is the consistency of thickened cream – it’s okay if there are lumps of flour visible.

Step 4
Heat the oil in deep-fryer or wok to 180°C. Lightly dust the prawns in the tempura flour, place in a sieve and shake off the excess flour. Coat the dusted prawn pieces in the cold tempura batter, then deep-fry until they are a light popcorn colour. Because the pieces are small they will not need much time to cook. The pieces should come out with a lovely crunchy coating. Remove and drain, shaking off any excess oil. If you’re using the Kleenmaid 90cm GCTEK9020 electronic gas cooktop, you’ll find that the cooktop also features auto reignition. This means if the flame is extinguished the cooktop will reignite itself after determining that it is safe to do so. Such a neat feature!

Step 5
Divide the salad leaves among bowls and dress with only a small drizzle of the lemon dressing. Toss the prawns with 20–30 g of the spicy mayonnaise so that they are evenly coated. Place the prawns (like a little mountain!) on the top of the dressed salad bed and sprinkle with the chopped chives to garnish.

Planning to update your kitchen appliances or modernize your kitchen? Visit our New Modern Kitchen Showroom at Stones Corner today and avail of amazing kitchen appliance discounts!

Kimchi. It’s a staple in a Korean diet and it can be daunting for those who aren’t used to its spiciness and smell. It is one of the most popular and fastest side dishes. Kimchi rice can be paired with Spam, bacon, ham and a good old sunny side up egg or leave out the meat for a vegetarian version.

So if you feel like having some kimchi tonight, this easy kimchi fried rice recipe is just for you. This recipe also works on store-bought kimchi!

Image from SBS Recipe Page

INGREDIENTS:
1½ cups kimchi
1 tbsp vegetable oil
1 tbsp sesame oil
1 tbsp gochujang (Korean chilli bean paste)
4 cups cooked jasmine or short-grain rice
3 spring onions, trimmed and finely sliced
1 tsp salt
1 tbsp toasted sesame seeds
4 small sheets Korean nori, crumbled (or 1 sheet Japanese nori, toasted and crumbled)

Cook’s notes:
Oven temperatures are for conventional; if using fan-forced (convection), reduce the temperature by 20˚C. | We use Australian tablespoons and cups: 1 teaspoon equals 5 ml; 1 tablespoon equals 20 ml; 1 cup equals 250 ml. | All herbs are fresh (unless specified) and cups are lightly packed. | All vegetables are medium size and peeled, unless specified. | All eggs are 55-60 g, unless specified.

INSTRUCTIONS:

Step 1
Squeeze as much juice as you can from the kimchi, then finely slice it and set aside, reserving the juice.

Step 2
Heat a wok over high heat and add the vegetable oil and sesame oil. Add the kimchi to the wok and toss frequently until very fragrant. Add the gochujang and toss for about a minute, or until fragrant. If you’re using the Kleenmaid 90cm GCTEK9020 electronic gas cooktop, you’ll find that the cooktop also features auto reignition. This means if the flame is extinguished the cooktop will reignite itself after determining that it is safe to do so. Such a neat feature!

Step 3
Add the rice, pressing it onto the sides of the wok to separate the grains. Add the reserved kimchi juice, spring onions and salt, and mix everything well, allowing the rice to lightly toast against the sides of the wok.

Step 4
Scatter the rice with sesame seeds and crumbled nori and serve.

Note:
Korean nori is available from Asian supermarkets often roasted with sesame oil and salted, and is easily crumbled. You can also keep a pack or two in the pantry. It makes a great snack.

Tip:
If you want to get rid of that kimchi smell in your fridge, Ashlea recommends on Bon Apetit to mask kimchi and other weird smells with cotton balls soaked in vanilla extract and placed in a shot glass.

Thinking of upgrading your kitchen appliances? Craftbuilt Kitchens’ own experienced professionals, holding over 40 years of expertise on their belt, can help you pick out the right one. Ask about our 40% Kleenmaid discount offer.

Finding the right kitchen can be easy when you sit down with us. Visit our modern showroom at Stones Corner today and avail of amazing discounts!

The Perfect Steak

Formal dinners are social events that require guests to dress up and follow polite etiquette. Some examples are social gatherings at a hotel, formal wedding or a private function.

While dining at a nice restaurant can be expensive, you can still enjoy a special formal night “out” by recreating the same experience in your own home.

How To Have A Formal Dinner At Home:

  1. Set the dining table with a clean white cloth.
  2. Pick out nice dishes and utensils.
  3. Prepare a centrepiece. Making one is simple. Pick out a clear bowl or glass container, and pop in fresh flowers from the garden or sweet chocolate treats wrapped in foil as a display. Even your wine can be a centrepiece.
  4. If you want to go a little extra, request your guests to join your formal night with an invitation and ask them to dress up nicely!

Formal dinner nights are fun and it’s a great way to practice good manners and social etiquette. And at the end of the night, you get to toast to everyone’s successes and good health!

If you’re planning a dinner for two or a small party, you can never go wrong with good ol’ fashion steak. Here’s a recipe from Marco Pierre White shared during an episode of MasterChef.

The Perfect Steak

Marco Pierre White’s Perfect Steak Recipe (Serves: 4)

INGREDIENTS:

Olive oil

4 Sirloin steak

Rosemary, picked

Juice of 1 lemon

Salt, to taste

INSTRUCTIONS:

  1. Drizzle olive oil onto a grill pan and set over high heat.
  2. Drizzle oil on steaks and rub all over. Season steaks with salt.
  3. Place steaks on grill pan , turning to make cross hatch marks.
  4. Turn steaks, sprinkle with picked rosemary and salt and drizzle with olive oil.
  5. Turn off heat and allow to finish cooking and rest.
  6. Drizzle with lemon juice and serve.

Cook the perfect steak on top of a perfect, modern and functional stove top. Upgrade your stovetop or kitchen when you visit our Updated Modern Kitchen Showroom at Stones Corner today and avail of amazing kitchen appliance discounts!

Family Game Night Favourite

When it comes to game night, everybody’s got their game face on. We mostly prefer to have finger foods that aren’t too messy but at the same time we need a good amount to energise us. After all, game night is all about competition!

So take out the board games and cards, or clear out the furniture for charades. Game night is a great way to get all the members of the family and friends together. Try this Beer Battered Pluto Pups recipe from Taste.

Family Game Night Favourite

Image from Taste Recipe Page

INGREDIENTS:

1 tablespoon olive oil

8 Gourmet Beef or Lamb Sausages

225g (1 1/2 cups) self-raising flour

Pinch of salt

1 egg, lightly whisked

1 x 375ml btl beer

Vegetable oil, to deep-fry

75g (1/2 cup) plain flour

Tomato sauce, to serve

INSTRUCTION:

Step 1

Heat the olive oil in a frying pan over medium heat. Add the sausages and cook, turning occasionally, for 15 minutes or until cooked. Transfer to a plate. Set aside for 30 minutes to cool.

Step 2

Meanwhile, combine the self-raising flour and salt in a large bowl. Make a well in the centre. Add the egg and gradually whisk in the beer until a smooth batter forms.

Step 3

Add enough vegetable oil to a large heavy-based saucepan to reach a depth of 5cm. Heat to 180°C over high heat (when oil is ready a cube of bread will turn golden brown in 15 seconds). If you’re using the Kleenmaid 90cm GCTEK9020 electronic gas cooktop, you’ll find that the cooktop also features auto reignition. This means if the flame is extinguished the cooktop will reignite itself after determining that it is safe to do so. Such a neat feature!

Step 4

Insert 1 skewer into each sausage lengthways. Place the plain flour on a plate. Roll 2 sausages in the flour to lightly coat. Dip the sausages, 1 at a time, into the batter to evenly coat. Shake off excess. Add sausages to the oil and cook for 2 minutes or until crisp and golden brown. Transfer to a plate lined with paper towel.

Repeat, in 3 more batches, with the remaining sausages, flour and batter, reheating the oil between batches. Place the Pluto pups in a serving bowl and serve with tomato sauce.

Thinking of updating your kitchen stove top? Visit our Updated Modern Kitchen Showroom at Stones Corner today and avail of amazing kitchen appliance discounts!

Mini Pineapple Pizza Recipe

We all have our childhood favourites cooked by mum or dad.

Remember that candy that makes you feel like a superhero or the cupcake baked by mum as a treat when you’re feeling down? Relive those childhood moments and favourites. If you can’t buy them at the store, you can definitely recreate some at home!

Memories of food associated with growing up influenced you in many ways. Share those memories with your love ones!

Mini Pineapple Pizza Recipe

Image from Taste Recipe Page

Did mum make mini pizzas before and do you feel like recreating it? Here’s a quick and easy recipe of Mini Ham Pineapple Pizzas I found on Taste. Between you and me, I switched the ham with bacon! Yum!

INGREDIENTS:

  • 30cm pizza base
  • 1 tablespoon tomato paste
  • 35g shaved leg ham, thinly sliced
  • 225g can pineapple pieces in natural juice, drained
  • 1/3 cup grated mozzarella cheese

INSTRUCTIONS:

Step 1

Preheat oven to 200°C or 180°C fan-forced. We recommend Kleenmaid’s Multifunction Oven 60CM OMF6030 because of its lock on electric timer and its lower heating element for pastries.

Lightly grease a large baking tray. Using a 7cm-round cutter, cut 8 rounds from pizza base. Place rounds on prepared tray.

Step 2

Spread each round with 1/2 teaspoon tomato paste. Top with ham, pineapple and cheese. Bake for 10 minutes or until cheese has melted and base is crisp.

And you’re done!

If you’re looking for a kitchen manufacturer and specialist who can guide you in designing the right kitchen for your personal needs from benchtops to cabinet storage, and more! Craftbuilt Kitchens’ own experienced professionals hold over 40 years of expertise on their belt.

We can also recommend the right modern kitchen appliance for you. Finding the right kitchen can be easy when you sit down with us. Visit our Stones Corner Design Studio today and avail of amazing discounts!

Easy Hot Dog Recipe With Caramelised Onion

Whether it’s cricket, the Australian Open or NRL, you can definitely please a crowd with a sports food favourite. Planning to have guests over to watch a sports game, whether it’s a pre-recorded game or a live one, sport snacks staples like nachos and the like are definitely a must-eat while you cheer for your favorite team.

Pair your beer with this easy hot dog recipe topped with caramelised onion, from Taste.

Easy Hot Dog Recipe With Caramelised Onion

Image from Taste Recipe Page

INGREDIENTS:

Cook time: 20 minutes Serves: 6

  • 2 tablespoons olive oil
  • 6 Italian Pork Sausages
  • 2 brown onions, halved, thinly sliced
  • 1 teaspoon fennel seeds
  • 1 1/2 tablespoons brown sugar
  • 1 1/2 tablespoons white wine vinegar
  • 6 hot dog rolls
  • 2 tablespoons tomato chutney or relish
  • 60g pkt Australian Baby Rocket
  • 200g brie, thinly sliced

INSTRUCTIONS:

Step 1

Heat half the oil in a frying pan over medium heat. (Alternatively, preheat a barbecue grill or chargrill on medium.) Add sausages and cook, turning occasionally, for 8-10 mins or until browned all over and cooked through. Transfer to a plate.

Step 2

Meanwhile, heat the remaining oil in a large frying pan over medium heat. Add the onion and fennel seeds. Cook, stirring occasionally, for 10 mins or until golden and starting to caramelise. Add the sugar and vinegar and cook for a further 1 min or until caramelised. If you’re using the Kleenmaid 90cm GCTEK9020 electronic gas cooktop, you’ll find that the cooktop also features auto reignition. This means if the flame is extinguished the cooktop will reignite itself after determining that it is safe to do so. Such a neat feature!

Step 3

Use a serrated knife to split each roll lengthways (don’t cut all the way through). Spread each roll with the chutney or relish. Divide the rocket, brie, sausages and onion mixture evenly among rolls. Season to taste!

Opting a healthier veggie option? Here’s a video recipe from Good Chef Bad Chef Rosie Mansfield.

Planning to update your kitchen appliances or modernize your kitchen? Visit our Updated Modern Kitchen Showroom at Stones Corner today and avail of amazing kitchen appliance discounts!

How to cook Gnocchi

Doing something together is a great and fun way to get to know each other better. Activities can bring out personalities that you’ve never seen before.

What’s the best way to get to know each other intimately? Try a new recipe! Something not too difficult and both can definitely agree on. Especially, a recipe you both haven’t tried yet!

We suggest Good Chef Bad Chef’s Ricotta Gnocchi. Sounds like a handful but it’s easy to make.

How to cook Gnocchi

Image from Good Chef Bad Chef Recipe Page

INGREDIENTS:

  • Serves 5. Time 25 minutes
  • 500g ricotta
  • 150g pasta tipo “00” plain flour
  • ¼ cup chives, chopped
  • 1 egg
  • 150g parmesan
  • Salt and pepper

INSTRUCTIONS:

  1. Place all ingredients into a mixing bowl and combine well with your hands.
  2. Dust flour onto a benchtop and roll the pasta dough into long even strips.
  3. Cut into bite sized pieces. If you’re planning to renovate your kitchen, laminate benchtops work great. They come in a range of colours to suit any taste.
  4. After cutting into bite sized pieces, carefully place them into boiling water, stir around the water gently and when the gnocchi rises to the top it is cooked.
  5. Remove it with a strainer.
  6. Add cooked gnocchi to sauce of your choice and serve immediately.

Thinking of updating your kitchen stove top? Visit our Updated Modern Kitchen Showroom at Stones Corner today and avail of amazing kitchen appliance discounts!

Baking Damper Bread In Oven

Love the smell of baked bread? Why not make your own? Do away with the store bought products and bake bread in your own kitchen.

Imagine the fresh aroma of crisp, crumbly and moist newly baked bread – hot from the oven. Entirely possible when you have the right benchtop for kneading dough and the right oven for baking bread.

First time baking bread? Try this easy 4-ingredient simple Damper Bread recipe from Yummly:

Prepare for your kitchen to smell heavenly!

Baking Damper Bread In Oven

Image from Yummly Recipe Page

INGREDIENTS:

  • 250 g self-raising flour
  • 1/2 tsp salt
  • 25 g unsalted butter chilled cubed
  • 175 ml milk

PREP TIME 10 Minutes. COOK TIME 30 Minutes. SERVES 8

INSTRUCTIONS:

  1. Mix the flour with the salt in a large bowl. Add the butter and rub it into the flour with the tips of your fingers, until it resembles fine crumbs.
  2. Stir in the milk with a round blade knife (butter knife) to make a soft, but not sticky dough.
  3. Turn out onto a lightly floured work surface and shape into a soft, smooth ball.
  4. Set the ball of dough onto a tray or baking sheet and flatten gently to make a round about 17cm across. Cut a deep cross in the dough and brush lightly with milk.
  5. Bake at 190C for 30 minutes until golden.
  6. Serve warm or at room temperature.

Invest in the best and modern kitchen appliance and have the confidence to try out a more experimental and creative approach in baking bread. It gives off a lovely baked aroma which is perfect for socialising in your modern kitchen space.

Good Chef Bad Chef Adrian Richardson shows us how to make a perfect loaf of bread in the Kleenmaid Hydrolytic Steam Oven:

If you’re looking for a kitchen manufacturer and specialist who can guide you in designing the right kitchen for your personal needs, Craftbuilt Kitchens’ own experienced professionals hold over 40 years of expertise on their belt.

Whether you’re opting for a modern, contemporary, minimalistic or traditional approach, finding the right kitchen can be easy when you sit down with us. Visit our Stones Corner Design Studio today and avail of amazing discounts!

A while back there was a trend that went all the rage. A restaurant went viral because its main attraction is dining in the dark. The experience is expensive but a lot of diners claimed that it was worth it.

You can also recreate the same experience at home. 

  1. It’s easy to do and simply a great romantic theme and can be an entertaining bonding experience.
  2. It’s a fun experience for the whole family. Kids get a sensory adventure with their sense of smell, taste and sound.
  3. It’s a unique culinary experience for everyone. Tip: Your usual or favourite food tastes very different without visuals. Which means you can savour your meal more.
  4. A great way to appreciate how your food taste. This is why companies conduct blind taste tests. Testers rely on their taste buds than how their food looks.
  5. Diners and guests will value their other senses more than their eyesight, making them aware of what each of their senses can do even when doing simple tasks. Everyone will be busy focusing on eating blind.

 Cooking in the Kitchen Home

How to Create the Experience Of Dining In the Dark

That famous restaurant had servers using night vision goggles. You don’t need to do the same. You can recreate the same atmosphere.

  1. Have it at night when the moon is not full (at its brightest).
  2. Block out lights from the outside by closing windows and drawing your curtains. Have the dinner at an area that won’t be damaged by spills and has less obstacles that may cause people to trip and stumble in the dark.
  3. You can use blindfold or padded eye masks in a dimly lit room. You can lead your guests to your seat better this way.
  4. You can have it in your dining room or have it around your benchtop in the kitchen so that in case it gets messy, you can clean up easily. Plus, it’s easy to serve food straight from the prep area.
  5. You can choose to have the food ready on the table and covered, or serve it when they are seated at the table – blindfolded. The important thing to remember is not letting them know what they’re having. Also, try to minimise the smell of the food before serving. So they won’t guess too easily!

Food for Dining In the Dark:

You can basically serve any type of food you want for this experience but make sure it’s not too messy and difficult to eat. Here are some things to remember when serving and eating food in the dark:

  1. Serve meals that have texture and flavour. When you have a helpful stove or oven-like Kleenmaid’s Hydrolytic Steam Oven, it helps give you that crunch and crisp needed for your freshly baked bread or crispy roast crackling.
  2. Prepare simple meals packed with flavour.
  3. Whether you’d like your diners to eat with their hands, cut their food blind with their utensils or spoon feed them yourself, make sure to serve it in appropriate portions. They may have a difficult time getting food onto their spoons and into their mouth.
  4. Try to avoid messy recipes with too much sauce or anything else that’s messy. Finger food works.
  5. You can serve drinks with straws or in spill-proof containers.
  6. Lastly, save some of the meal so that everyone can see what they ate when they’re done. They’ll have a hard time figuring out which one’s chicken and fish if they’ can’t see what they’re eating!

You can have a lot of fun with a well equipped kitchen. We at Craftbuilt Kitchens can assist you in fulfilling your kitchen dream. Upgrade your home with your new 2019 personality, goals and modern kitchen designs. Our designers at 76 Old Cleveland Road, Stones Corner are happy to help you. You can also call us at (07) 3341 9172 to set an appointment.

Easy Simple Doughnut Recipe

The best treats are often those that are homemade. Have a sweet treat and bake doughnuts tonight with this easy stove top doughnut recipe.

Most people pair theirs with coffee, hot chocolate and milk. While some go for cider, juice, or even craft beer. Well, whatever complementary drink you choose for your doughnut, have a fun time making these healthy little morsels tonight. Certainly, something you can share with friends, guests and neighbours.

Plus, it’s a great conversation starter when they’re around your benchtop. Try this recipe from Taste.

Easy Simple Doughnut Recipe

Image from Taste Recipe Page

INGREDIENTS

  • 490g (3 1/4 cups) plain flour
  • 55g (1/4 cup) caster sugar
  • 3 teaspoons dried yeast
  • Pinch of salt
  • 250ml (1 cup) milk, warmed
  • 100g butter, melted
  • 3 egg yolks
  • Canola oil, to deep-fry
  • 215g (1 cup) caster sugar, extra
  • 2 teaspoons Masterfoods Ground Cinnamon

INSTRUCTIONS

Step 1

Combine flour, sugar, yeast and salt in a bowl. Make a well. Mix in milk, butter and egg until dough starts to come together – it may be sticky.

Step 2

Knead on a well-floured surface until smooth. Place in a greased bowl. Cover. Prove for 1 1/2 hours or until dough has doubled in size.

Step 3

Punch down the dough. Knead on a lightly floured surface for 2 minutes or until smooth. Roll out dough until 1cm thick. Rest dough for 2 minutes.

Step 4

Use an 8cm round cutter to cut out discs. Use a 3.5cm round cutter to cut out centres. Place on a lined tray. Set aside for 15 minutes to rise slightly.

Step 5

Combine extra sugar and cinnamon on a tray. Heat oil to 180°C. Deep-fry 4-5 doughnuts for 40 seconds each side or until puffed and golden. If you’re using the Kleenmaid 90cm GCTEK9020 electronic gas cooktop, you’ll find that the cooktop also features auto reignition. This means if the flame is extinguished the cooktop will reignite itself after determining that it is safe to do so. Such a neat feature!

Step 6

Transfer the doughnuts to the sugar mixture and turn to coat. Repeat, in 3 more batches, with remaining doughnuts.

Want to add some nutritious veggie options to your doughnuts? Join chef Adrian Richardson and nutritionist Rosie Mansfield as they spruce the doughnut up with veggies.

We also want to let you know that we’re relocating to Stones Corner! Visit our Updated Modern Kitchen Showroom at Stones Corner today and avail of amazing kitchen appliance discounts!